Introduction
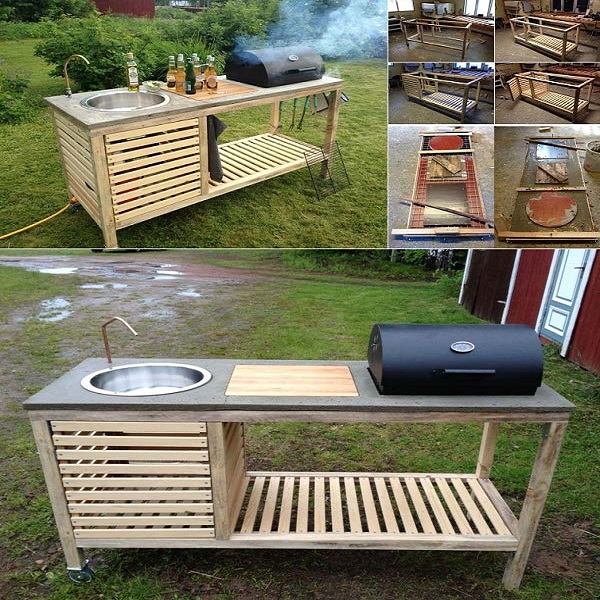
Diy bbq grill – There’s nothing quite like the satisfaction of firing up your own handmade BBQ grill on a warm summer evening, surrounded by friends and family. Not only does building your own grill add a personal touch to your outdoor space, it can also be a cost-effective solution compared to purchasing a high-end commercial model. In this comprehensive guide, we’ll take you through the process of constructing a sturdy and functional backyard BBQ grill from scratch. Whether you’re a seasoned DIY enthusiast or a beginner looking for a rewarding project, follow these steps carefully to create a grill that will be the envy of your neighborhood.
Materials and Tools You’ll Need
Before diving into the build, ensure you have all the necessary materials and tools gathered. Here’s a list to get you started:
Materials:
- Concrete blocks or bricks (for the base)
- Firebrick or heat-resistant tiles (for the cooking area)
- Metal grill grates
- Steel or stainless steel sheet (for the firebox liner)
- Heat-resistant mortar or refractory cement
- High-temperature paint (optional)
- Chimney flue or vent (optional)
Tools:
- Measuring tape
- Level
- Masonry saw or chisel
- Shovel (for leveling the ground)
- Hammer and nails (for marking lines)
- Safety gear (gloves, goggles, dust mask)
- Drill with metal bits (if attaching metal components)
- Paintbrush (if using high-temperature paint)
Plan and Design
Start by deciding on the size and design of your grill. Consider factors like the available space in your backyard, how many people you usually cook for, and any additional features you might want (e.g., a chimney or storage space). Sketch out your plan and determine the number of blocks or bricks required based on your dimensions.
Prepare the Site
Choose a level spot in your backyard for your grill. Clear the area of debris, grass, or any obstacles. Use a shovel to level the ground if needed, and mark out the perimeter of your grill with string or spray paint.
Build the Base
Lay the first course of concrete blocks or bricks according to your design, ensuring they are level. Continue stacking, staggering joints for added stability, until you reach the desired height. For added reinforcement, you can use mortar between layers, but this is optional for a basic structure.
Create the Firebox
Designate an area within the base for the firebox, where you’ll be placing the charcoal or wood. Line this section with firebricks or heat-resistant tiles using refractory cement to secure them in place. This lining will protect the surrounding masonry from excessive heat and prolong the life of your grill.
Install the Grate and Ventilation
Cut the metal grill grate to fit snugly over the firebox opening. If adding a chimney or vent, incorporate it at this stage to ensure proper airflow, which is crucial for maintaining consistent temperatures and reducing smoke buildup.
Finishing Touches
For aesthetics and added durability, consider painting the exterior of your grill with high-temperature paint. This will also help protect the masonry from weathering. Ensure all paint used is suitable for high-heat applications.
Safety First
Before using your new grill for the first time, inspect it thoroughly for any loose bricks or sharp edges. Always use caution when handling fire and follow safe grilling practices.
Upcycled Wheelbarrow Grill
Transform an old wheelbarrow into a charming, portable grill. Clean it thoroughly, line the bottom with heat-resistant bricks or metal sheets, and install a grill grate on top. Add some wheels for easy maneuvering, and you’ve got yourself a rustic grill that doubles as a conversation starter.
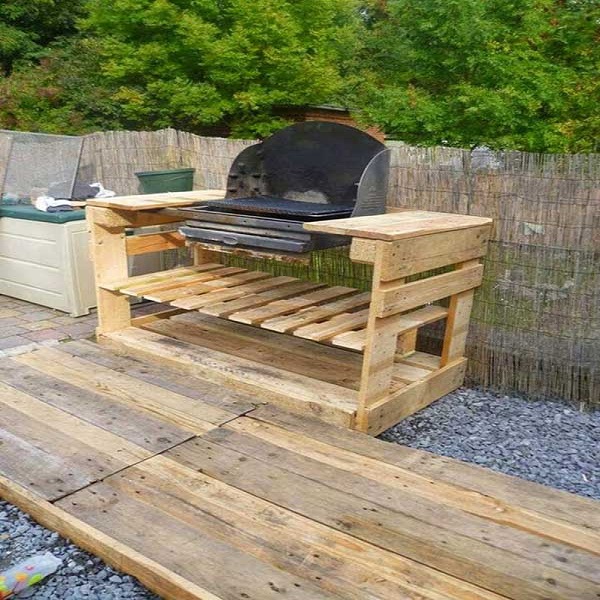
Pallet Wood Pizza Oven
Combine the smoky flavors of a grill with the allure of wood-fired pizza. Repurpose wooden pallets to construct a small, insulated oven. Layer the pallets, insulate them with clay or heat-resistant cement, and finish with a dome-shaped roof. Top it off with a pizza stone for even heat distribution and get ready to impress your guests with homemade pizzas.
Concrete Block Grill
For a budget-friendly yet sturdy option, stack concrete blocks to form the base and sides of your grill. Leave an open space for the charcoal or wood, and place a metal grate on top for cooking. This modular design allows for customization, letting you add storage or a prep area as needed.
Repurposed Propane Tank Grill
Turn an old propane tank into a sleek, industrial-style grill. After safely draining and cutting the tank, clean and sandblast it. Install a custom-made grill grate, ventilation holes, and a chimney for smoke escape. Finish with a high-temperature paint for a professional look that’s sure to draw compliments.
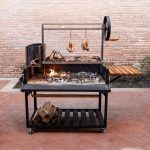
Hearth-Style Brick BBQ
Embrace classic elegance by constructing a permanent brick BBQ in your backyard. Design a simple hearth with a firebox and chimney, leaving space for a metal grate. This project requires more effort and planning, but the end result—a timeless, durable grill—will be worth it.
Drum Grill
Give new life to a large metal drum by converting it into a functional grill. Cut out a door for access, add ventilation holes, and install a grill grate. For added flair, paint the drum in vibrant colors or wrap it in heat-resistant wire mesh for a modern industrial look.
Tractor Rim Grill
Score an old tractor rim from a farm supply store or online marketplace and convert it into a unique, circular grill. Mount it securely on a stand, fill the bottom with lava rocks for heat distribution, and place a grill grate on top. Its large diameter makes it perfect for group cooking.
Cinder Block Smoker
Combine cinder blocks to create a multi-level smoker, ideal for slow-cooking meats. Arrange the blocks to form compartments for firewood at the bottom, a water pan in the middle for moisture, and a grill grate at the top for the food. Seal any gaps with high-temperature silicone to enhance efficiency.
Vintage Car Grill BBQ
For the ultimate conversation piece, repurpose the front grill of an old car as a BBQ grill. Clean and restore the grill, attach legs for stability, and install a custom-fit grate. This project brings together nostalgia and functionality in one eye-catching package.
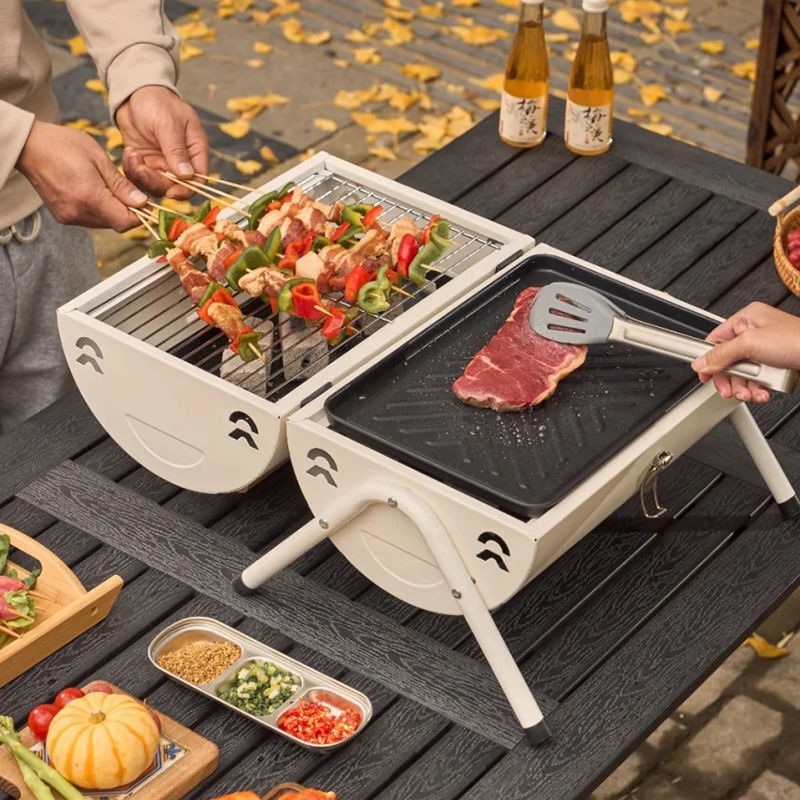
Portable Backpacking Grill
For the adventurous cook, craft a compact, portable grill using lightweight materials like titanium or stainless steel sheets. Foldable designs are ideal, allowing you to pack it up and take it on camping trips or beach outings. Combine it with a compact fuel source for grilling on the go.
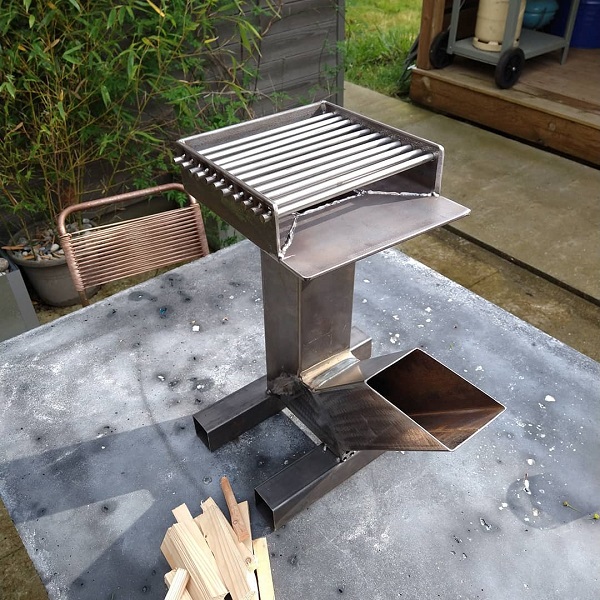
Assembly
This is where your vision starts to take shape. If you’re not experienced in welding, consider taking a class or enlisting the help of a friend who is. Follow these general steps:
- Cutting: Use an angle grinder or plasma cutter to shape your metal pieces according to your design.
- Welding: Assemble the frame, attach the grilling grate, and secure the chimney or ventilation system. Don’t forget to weld on the wheels if you opted for mobility.
- Adding Details: Install the hinges and latches for the lid. Consider adding handles or a thermometer for convenience.
Finishing Touches
Once your grill structure is complete, apply a final coat of high-temperature paint to protect it from the elements and add a touch of personal style. You can also customize your grill with unique features like a bottle opener, a prep table attachment, or personalized branding.
Safety and Testing
Before firing up your masterpiece for the first time, perform a thorough safety check. Ensure all joints are secure, there are no gas leaks (if applicable), and ventilation is adequate. Start with a small, controlled fire to test for any potential issues before hosting a full-blown cookout.
Conclusion
Building your own backyard BBQ grill not only adds a unique element to your outdoor living space but also provides a sense of accomplishment every time you light it up. With careful planning, attention to detail, and following these step-by-step instructions, you can create a custom grill tailored to your exact needs and preferences. Enjoy the process, and soon enough, you’ll be hosting memorable cookouts with your one-of-a-kind masterpiece as the centerpiece. Happy grilling!