Choosing the Right Design for Your BBQ Grill
When it comes to creating your DIY BBQ grill, selecting the right design is crucial. Think about the following factors before making a decision:

- Space: Measure your backyard area where you plan to set up your grill. Ensure the design fits well without crowding the space.
- Usage: Consider how often and for how many people you will be cooking. Larger designs suit frequent use and big gatherings.
- Cooking Style: Are you into slow-cooked smoky flavors or quick grilling? Choose a design that caters to your preferred cooking methods.
- Materials: Some designs require specific materials that can affect the taste of the food and maintenance needs.
- Budget: Keep in mind the cost. More complex designs usually mean more materials and a higher price tag.
- Skill Level: Be realistic about your DIY skills. A simple design is best for beginners, while complex ones may suit seasoned DIY enthusiasts.
Before you settle on a design, explore various DIY BBQ grill plans available online or in books. You can also mix ideas to create a customized grill that meets your specific needs. Remember, the design you choose should ensure safety, functionality, and durability beyond just aesthetics. Stick to a plan that balances all these aspects for a successful DIY BBQ grill project.
Materials and Tools You Will Need
To build your DIY BBQ grill, gathering the right materials and tools is essential. Here’s what you’ll need:
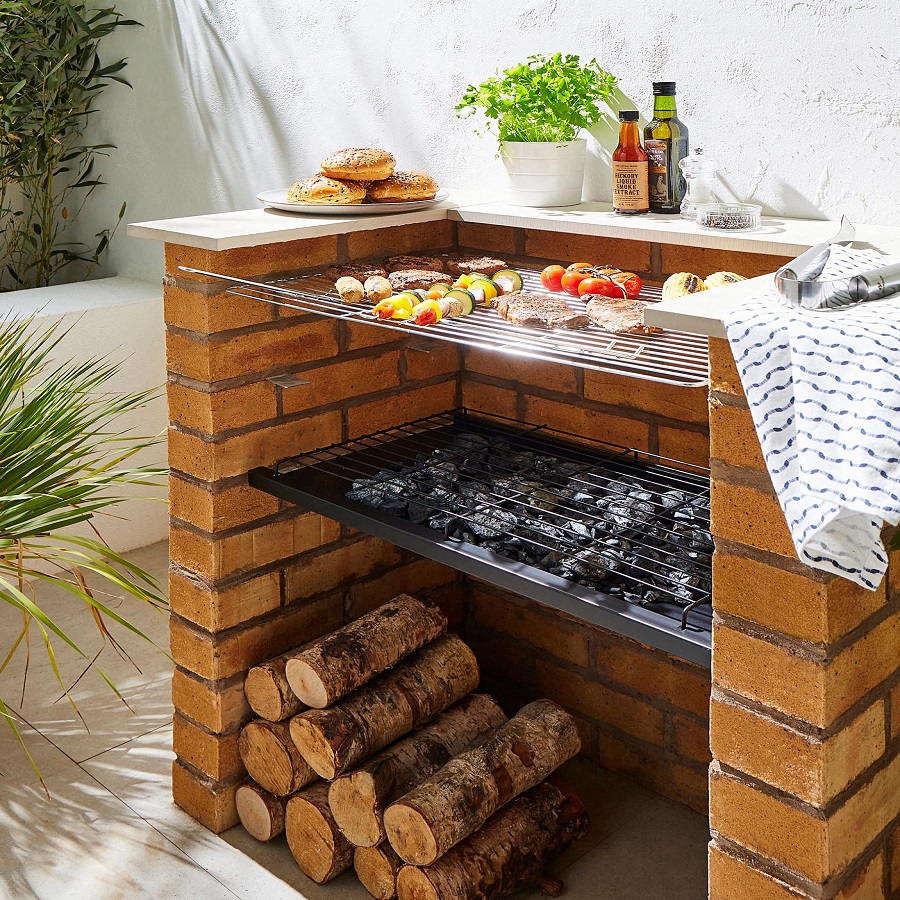
- Bricks or Steel: Choose between bricks for a sturdy, traditional grill or steel for a modern, durable one.
- Grill Grates: Select a grate that can withstand high temperatures and is the right size for your design.
- Mortar or Welding Supplies: For brick grills, you’ll need mortar to bind the bricks. For steel grills, welding equipment is essential.
- Metal Rods or Rebar: These are necessary for reinforcing the structure, particularly in brick grills.
- Measuring Tape and Level: Precision is key. Use a measuring tape for dimensions and a level to ensure everything is even.
- Trowel or Welding Gloves: A trowel will help with brick laying, while welding gloves are a must for steel grill assembly.
- Cutting Tools: For cutting metal or bricks, have the appropriate cutting tools on hand.
- Concrete: If you’re setting a foundation, concrete may be required to secure your grill’s base.
Remember, quality tools and materials make the construction process smoother and ensure your DIY bbq grill is safe and long-lasting. Stick to your design plan’s specifications, and don’t hesitate to invest in good-quality supplies for a better result.
 Step-by-Step Guide to Building Your Grill
Building your own DIY BBQ grill can be a rewarding project. Here’s a simplified step-by-step guide to help you get started:
- Foundation: Start by preparing a solid foundation if required. Use concrete for stability.
- Layout: Based on the design, lay out the first layer of bricks or place the steel frame.
- Brick Layers: For brick grills, apply mortar and stack bricks layer by layer. Check for levelness.
- Steel Framing: If using steel, assemble the frame by welding. Wear safety gloves.
- Grate Support: Install ledges or supports for the grill grates within the structure.
- Grill Grates: Once the body is stable, place the grill grates in the designated area.
- Finishing Touches: Add any additional layers or features, such as side tables or hooks.
- Inspection: Ensure everything is secure and there are no loose parts.
- Curing: For brick grills, let the mortar cure as instructed before using the grill.
- Test: Carefully test the grill with a small fire to ensure proper function.
During each step, make sure to measure and level every part. Make adjustments as needed to align with your design. Follow these steps and create a DIY BBQ grill that’s perfect for your backyard gatherings.
Safety Tips for DIY Grill Construction
When creating a DIY BBQ grill, safety cannot be overlooked. Here are key tips to assure a safe construction process:
- Wear Protective Gear: Always wear gloves, sturdy boots, and safety glasses.
- Ventilation: Work outdoors or in a well-ventilated area, especially when welding or cutting.
- Read Manuals: If you’re using power tools or equipment, read the user manuals first.
- Watch Fires: Never leave a test fire unattended. Have a fire extinguisher nearby.
- Check for Gas Leaks: If connecting to a gas source, use soapy water to check connections.
- Level Surface: Ensure your grill is on a flat, stable surface to prevent tipping.
- Quality Materials: Use materials rated for high heat and appropriate for grill construction.
- Follow Local Codes: Check local building and fire codes before starting your project.
- First-Aid Kit: Keep a kit close in case of minor injuries.
Safety first ensures many enjoyable BBQs with your homemade grill. Keep these tips in mind throughout your build.
 Customizing Your BBQ Grill
After following the basic steps to build your DIY BBQ grill, customization is your next exciting challenge. Here are ideas to make your grill uniquely yours:
- Paint: Choose high-heat resistant paint to give your grill a fresh and personal look.
- Handles and Knobs: Add custom handles and knobs that not only look great but also enhance functionality.
- Decorative Elements: Incorporate tiles or metalwork to create a decorative flair.
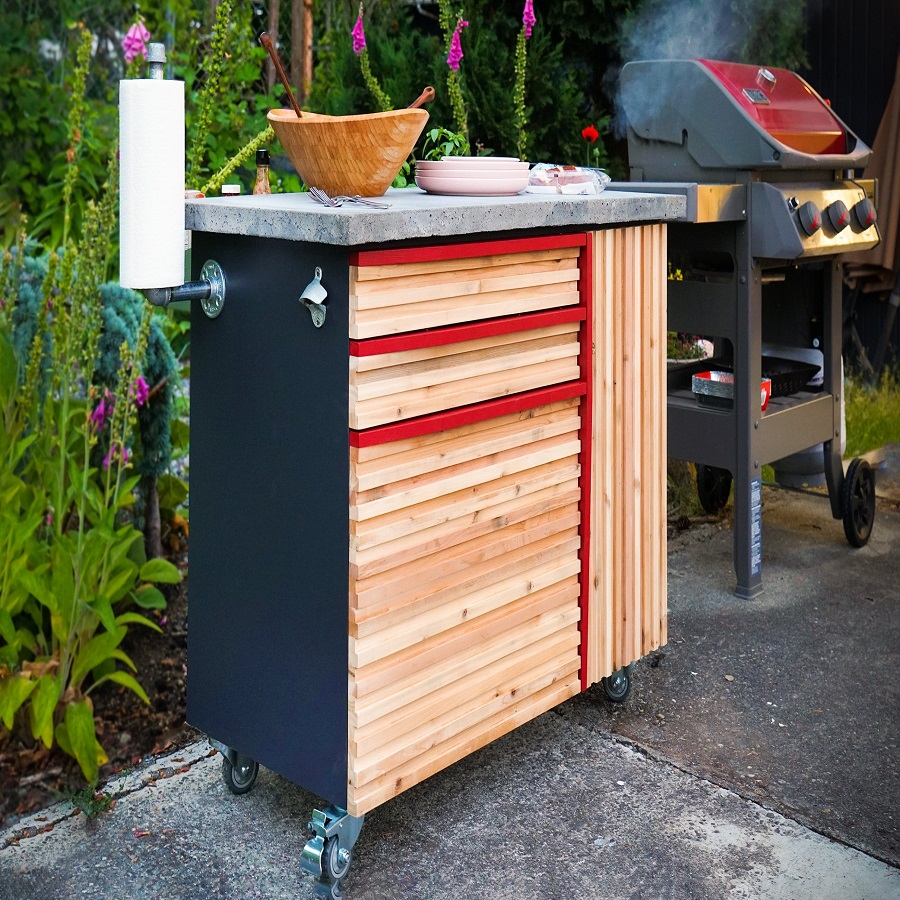
- Storage Solutions: Build in storage spaces for your grilling tools and accessories.
- Lighting: Install LED lights for nighttime grilling sessions. Make sure they are safe for outdoor use.
- Side Tables: Attach side tables for extra prep space. Use materials that match your grill.
- Wheels: If you want your grill mobile, attach heavy-duty wheels that can handle the weight.
When customizing, keep the grill’s safety and durability in mind. All additions should withstand heat and outdoor conditions. Your DIY BBQ grill not only cooks delicious meals but also stands out as a centerpiece in your backyard.
Maintaining Your Homemade BBQ Grill
To keep your DIY BBQ grill in top shape, regular maintenance is key. Here’s how to do it:
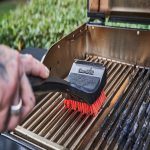
- Clean Regularly: After each use, brush off food particles from the grates. Deep clean every few months.
- Check for Damage: Look for cracks or rust, especially if your grill is made of bricks or steel.
- Tighten Connections: Make sure all bolts and supports are tight. Loose parts can be unsafe.
- Cover when not in Use: Protect your grill from the elements with a durable cover.
- Inspect for Safety: Before each use, check for issues that could lead to accidents.
- Season Grates: Apply a coat of cooking oil to the grates before and after grilling to prevent rust.
Sticking to these steps will prolong your grill’s life and ensure safe, delicious barbecues for years to come.
 Must-Have Accessories for Your BBQ Grill
After building your DIY BBQ grill, you’ll want to get the best cooking experience. The right accessories can help. Here are must-have items:
- Grill Brushes: Keep grates clean with tough brushes. Good hygiene means better tasting food.
- Tongs and Spatulas: Get long-handled ones to avoid burns. Flip and move food with ease.
- Meat Thermometer: Ensure meat is perfectly cooked. A thermometer avoids under or overcooking.
- Grill Light: A clip-on light helps you grill at night. See what you’re cooking clearly.
- Chimney Starter: Light charcoal quickly and evenly. No more lighter fluid taste.
- Aluminum Foil: Wrap food or line the grill. Makes clean-up easier and cooking faster.
- Grill Mats: Non-stick mats are great for small items. Nothing falls through grates.
- Smoking Box: Add wood chips for smoky flavors. Turns any grill into a smoker.
Invest in these items for better grilling. They add convenience and safety to your BBQ sessions. Happy grilling!
 Common Mistakes to Avoid When Building a BBQ Grill
Building your DIY BBQ grill can be an exciting endeavor, but it’s easy to stumble along the way. To help you avoid common pitfalls, here’s a list of mistakes to steer clear of:
- Ignoring Safety Protocols: Safety should always be your top priority. Don’t skip wearing protective gear or setting up in a well-ventilated area.
- Not Planning Ahead: Have a clear design and plan before you start. Changing plans midway can lead to a flawed build.
- Choosing the Wrong Materials: Use materials designed to withstand high temperatures. Avoid anything that can release toxic fumes when heated.
- Skipping the Foundation: If your design calls for a foundation, don’t overlook it. A stable base prevents future problems.
- Poor Measuring: Measure twice, build once. Inaccurate measurements can throw off your entire project.
- Ignoring Levelness: An uneven grill can lead to cooking and safety issues. Always use a level.
- Improper Tool Use: Use the right tools for their intended purposes. Wrong tool use can damage materials or cause injury.
- Not Testing for Stability: Always check for a wobbly structure. Make adjustments to ensure stability before the final test.
- Forgetting to Season the Grates: Seasoning your grill grates will protect them from rust and create a non-stick surface.
- Neglecting Post-Construction Inspection: Once built, inspect your grill thoroughly. Fix any issues before your first cookout.
By avoiding these common mistakes, you will enhance the safety and longevity of your DIY BBQ grill. Stay focused, follow the steps, and anticipate a result that brings endless enjoyment.