Essential Tools and Materials for Your DIY BBQ Grill
When embarking on a DIY BBQ grill project, having the right tools and materials is crucial. First, you’ll need a sturdy metal frame or an old grill to modify. You could opt for steel or aluminum depending on availability and budget.
Next, get metal grates or grill meshes. These are essential for the cooking surface. Stainless steel is a preferred choice due to its durability and resistance to rust.
A set of basic tools, including a welding machine, metal clippers, and safety equipment like gloves and goggles, are necessary. If you’re not experienced in welding, consider bolt-together kits that require less technical skill.
To customize your grill, gather materials for a handle, legs, and perhaps wheels for portability. Also, consider heat-resistant paint or finishes to preserve the grill and enhance its appearance.
Lastly, don’t forget components like screws, nuts, and bolts to assemble parts of your DIY BBQ grill. Ensuring you have all necessary tools and materials beforehand will make your building process smoother and more efficient.
Step-by-Step Guide to Building a Basic BBQ Grill
Building your own DIY BBQ grill can be a rewarding project. By following a simple step-by-step guide, you can create a functional centerpiece for your outdoor cooking adventures. Here’s how to get started:
- Select Your Frame: Choose a sturdy metal frame. Consider an old grill that you can modify, or a pre-made frame.
- Cut Your Metal: Using metal clippers, cut metal sheets to form the structure of your grill.
- Assemble the Frame: If you’re not welding, use nuts, bolts, and screws to put together your grill frame.
- Install the Grates: Place stainless steel grates or meshes on the frame. These will serve as the cooking surface.
- Attach Legs and Wheels: Add legs for stability. If you want your grill portable, attach wheels.
- Add Handles: Fix handles to make your grill easy to move and manage.
- Apply Finish: Coat your grill with heat-resistant paint to protect it from the elements.
- Final Assembly: Double-check all connections. Tighten screws and ensure the grill is stable and ready for use.
- Test Your Grill: Perform a small test. Check for any issues and make adjustments as needed.
By being careful and attentive at each step, you’ll end up with a reliable DIY BBQ grill that’s perfect for backyard cookouts. Remember to keep safety in mind throughout the whole process, using gloves and goggles when necessary to protect yourself.
Upcycling Ideas: Transforming Old Equipment into a New Grill
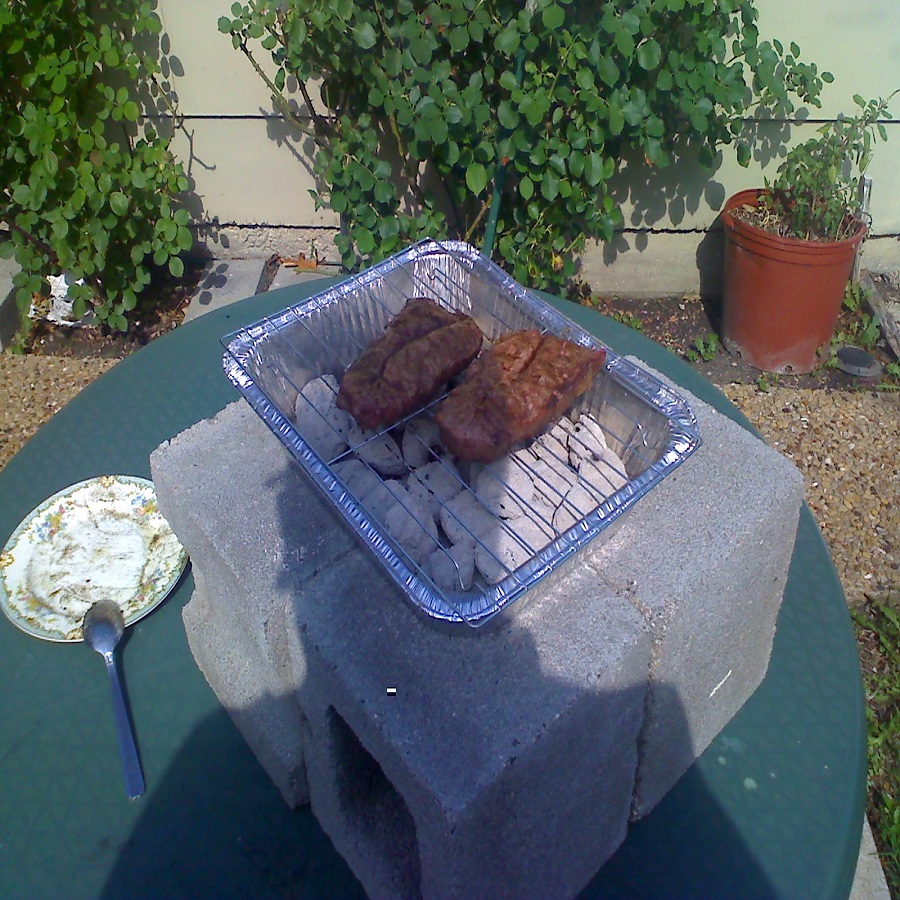
Upcycling old equipment into a new BBQ grill is both eco-friendly and cost-effective. Start by scouting for unused metal items. Old washing machine drums, metal barrels, or car rims make great candidates. Make sure they are clean and free of hazardous residues.
First, assess the durability of your chosen item. Ensure it can withstand high temperatures. This step is crucial for safety and functionality. Next, remove any rust or old paint. Use a wire brush or sandpaper to achieve a clean surface. You might need to cut the metal to size. Metal clippers work well for this task. Always wear gloves and goggles during this process.
Now, form the base of your grill. If you’re using a drum or barrel, ensure it stands stable. You may need to add legs. Old metal pipes or iron rods can serve as sturdy legs. Attach them securely using nuts, bolts, and screws.
For the cooking surface, select a grill grate that fits the opening of your upcycled frame. You can repurpose oven racks or grates from old BBQs. Ensure they are properly cleaned before installation.
Finally, consider aesthetics and practicality. Paint your grill with heat-resistant paint. This not only preserves the metal but also adds a touch of personal style. Now you have a unique, functional DIY BBQ grill ready for your next cookout!
Designing Your BBQ Grill: Tips and Considerations
Designing your DIY BBQ grill involves more than just assembling parts. It requires careful thought about both function and aesthetics. Here are some key tips and considerations to keep in mind:
- Size and Portability: Consider the size and portability of your grill. Decide how large you want the cooking surface to be based on the number of people you typically cook for. If you plan on moving the grill, think about integrating wheels.
- Material Choices: The materials you choose impact the durability and performance of your grill. Stainless steel is excellent for resisting rust and handling high temperatures but can be expensive. Alternatively, cast iron offers a high heat retention capacity, though it may require more maintenance.
- Ventilation: Proper air flow is crucial. Design your grill to have adjustable vents to control the temperature. This feature is especially important if you plan to add a smoker.
- Accessibility: Design your grill for easy access to coal or wood and cleaning. Consider how you can make ash removal simple and mess-free.
- Safety Features: Incorporate safety measures like a sturdy base and heat-resistant handles. Ensuring the grill is stable and can be handled safely even when hot is imperative.
By considering each of these aspects, you can design a DIY BBQ grill that not only fits your cooking needs but is also safe and appealing. Keep these points in mind during your planning phase to achieve the best results.
 How to Add a Smoker to Your DIY BBQ Grill
Adding a smoker to your DIY BBQ grill can elevate your cooking game. It allows you to infuse smoky flavors into your food, which is ideal for barbecue enthusiasts. Here’s a simple guide on how to integrate a smoker into your BBQ grill project.
- Choose the Right Smoker Box: The first step is selecting an appropriate smoker box. Opt for a stainless steel box as it resists rust and withstands high temperatures.
- Position the Smoker Box: Place the smoker box directly on top of the grill’s heat source. This could be charcoal briquettes or wood chips. Make sure it doesn’t hinder your cooking space.
- Add Smoking Wood: Fill the smoker box with wood chips of your choice. Hickory, mesquite, and applewood are popular options. These woods provide distinct flavors.
- Control the Temperature: Maintain a consistent temperature in your grill. Smokers require a lower temperature to smoke food properly. Keep it between 200°F to 275°F.
- Monitor the Smoke: Once the wood begins to smoke, adjust the grill vents to control airflow. Good airflow is essential to maintain stable smoking temperatures.
- Regularly Check the Wood Chips: Over time, the wood chips may burn out. Add more as needed to keep the smoke steady.
By following these steps, you can successfully add a smoker to your DIY BBQ grill. This adjustment lets you enjoy both grilling and smoking, using just one setup.
Safety Precautions When Constructing Your BBQ Grill
Safety must always be a top priority when constructing your own BBQ grill. Ignoring safety can lead to accidents and injuries, so it’s essential to follow these guidelines:
- Wear Protective Gear: Always wear gloves and safety goggles. They protect your hands and eyes from metal splinters and sparks.
- Work in a Ventilated Area: Make sure you work in a well-ventilated space. This helps you avoid inhaling harmful fumes from welding or paint.
- Check Equipment Before Use: Inspect all your tools and materials. Ensure they are in good condition and safe to use.
- Follow Instructions for Tools: Use every tool according to its instructions. This prevents misuse that could cause harm.
- Stable Construction Surface: Build on a flat surface to prevent your grill from tipping. A stable surface makes a safer working environment.
- Secure Loose Clothing: Tie back loose clothing and hair. Loose items can catch fire or get entangled in tools.
- Keep a Fire Extinguisher Handy: Have a fire extinguisher close by. This is crucial in case a fire starts during construction.
- Avoid Working Alone: If possible, work with a buddy. Having someone to assist can aid in handling heavy materials and in emergencies.
By keeping these safety precautions in mind, you can build your DIY BBQ grill with confidence, knowing you’ve minimized the risks.
Customizing Your DIY Grill: Aesthetic and Functional Enhancements
After building your basic DIY BBQ grill, customizing it can add both beauty and function. Here are ways to enhance your grill:
- Painting: Choose heat-resistant paint to add color and protect your grill from rust. This step can make your grill stand out.
- Adding Features: Consider installing additional features such as a side table for preparation space or hooks for hanging tools. These accessories increase functionality.
- Decorative Elements: Attach decorative metalwork or tiles to your grill for a unique look. This can reflect your personal style.
- Upgraded Materials: If budget allows, upgrade some components to higher-quality materials like stainless steel. This improves both look and longevity of your grill.
- Lighting: Install LED lights for nighttime grilling. This makes cooking easier and adds an atmospheric touch.
- Thermometer Installation: Fit your grill with a built-in thermometer for precise cooking. This helps you monitor the temperature without constant checking.
By doing these enhancements, your DIY BBQ grill becomes more versatile and appealing. Enjoy crafting a grill that not only cooks well but also looks great!
 Maintaining Your Homemade BBQ Grill for Longevity
Ensuring your DIY BBQ grill lasts for many seasons requires regular maintenance. Here’s what to do:
- Clean After Use: After grilling, always scrape off food bits from the grates. Brush them with a grill brush.
- Oil the Grates: To prevent rust, lightly coat the grates with cooking oil. Do this while they’re still warm.
- Check for Rust: Periodically inspect your grill for rust spots. Use sandpaper to remove any you find.
- Tighten Connections: Go over the nuts, bolts, and screws. Tighten any that have loosened over time to keep the grill stable.
- Cover Your Grill: Protect your grill from the elements with a cover. This prevents weather damage.
- Store Properly: If possible, store your DIY BBQ grill indoors during harsh weather. This extends its life.
- Season Cast Iron: If you have cast iron parts, season them regularly. This maintains the non-stick surface.
- Regular Check-ups: At the start of grilling season, check your grill thoroughly. Look for issues that need fixing.
By following these simple steps, your homemade DIY BBQ grill will continue to be a dependable cooking friend for the long haul.
